
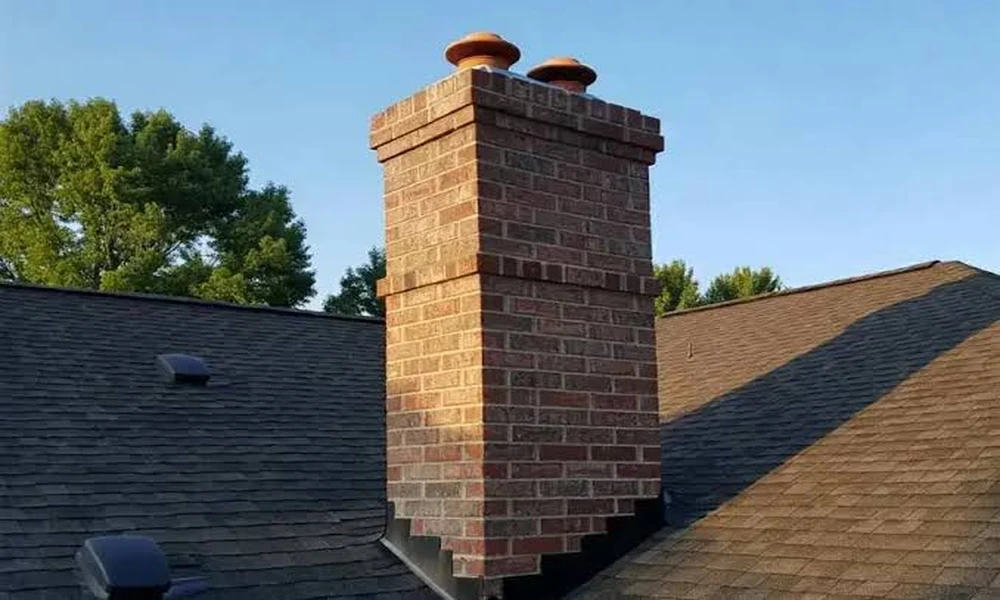
A chimney is among the most weather-exposed structural elements of any home. Subject to repeated freeze-thaw cycles, sustained heat from combustion, and constant moisture exposure, masonry chimneys deteriorate gradually even when well constructed. The problem is that the deterioration is often invisible from the ground until it has advanced well beyond the point where simple maintenance would have sufficed. Chimney masonry repair is most effective, least disruptive, and least expensive when addressed early. Understanding what causes masonry to fail, what the warning signs look like, and what the main repair types involve helps homeowners make timely decisions rather than reactive ones.
What Causes Chimney Masonry to Deteriorate
The primary driver of masonry deterioration in most climates is the freeze-thaw cycle. Water enters microscopic cracks in mortar and brick through rain, condensation, and snow melt. When temperatures drop below freezing, that moisture expands as it turns to ice, widening the cracks with each cycle. Over repeated winters, what begins as a hairline crack in a mortar joint can become a structural opening that allows water to penetrate deep into the chimney’s masonry core.
Heat and combustion byproducts attack from the interior. Creosote, a tar-like residue produced by burning wood, accumulates in the flue and causes chemical degradation of mortar joints over time. The acidic compounds carried in flue gases also erode mortar from within, particularly in chimneys that are used frequently and cleaned infrequently.
The chimney crown, the flashing where the chimney meets the roofline, and the mortar joints are typically the first components to show failure because each is directly exposed to weathering with little protection. Damage visible at these points is often a sign that interior deterioration is already underway.
The Chimney Crown and Why It Fails
The chimney crown is the concrete or mortar cap that covers the top of the chimney, surrounds the flue opening, and slopes outward to direct water away from the masonry below. A properly formed crown is the primary barrier between rain and the interior of the chimney stack.
Many original chimney crowns were constructed with standard mortar mix rather than a true concrete or crown-specific compound, which lacks the durability needed for continuous weather exposure. These crowns develop cracks relatively quickly. Chimney crown repair for minor cracking typically involves applying a flexible, waterproof crown sealant that bonds to the existing surface and prevents further water infiltration. When cracking is structural or the crown has deteriorated beyond surface damage, full replacement with properly mixed concrete is the appropriate repair.
Homeowners most commonly discover crown damage after a water stain has already appeared on an interior ceiling or wall near the chimney. At that point, the crown has been leaking long enough for water to travel through the masonry into the home. Sealing the crown on a five-to-seven-year cycle prevents this scenario entirely and costs a fraction of the interior water damage repairs that follow an ignored crown failure.
Tuckpointing: The Most Common Masonry Repair
Tuckpointing is the process of removing deteriorated mortar from the joints between chimney bricks and replacing it with fresh mortar. It is the single most common type of chimney masonry maintenance and, when performed at the right time, prevents the far more serious and expensive problem of loose or missing bricks.
Mortar has a shorter functional lifespan than brick. In normal conditions, mortar joints may last 25 years before requiring attention, while the brick itself can remain structurally sound for a century or more. When mortar begins to recede, crumble, or pull away from the brick face, water penetration accelerates and the brick itself begins to absorb moisture it was not designed to handle.
Proper tuckpointing requires grinding out the deteriorated mortar to a depth of at least half an inch before the new material is applied. Surface-level patching that does not remove the failing mortar provides only a cosmetic fix and typically fails within a season or two. Mortar composition also matters: a replacement mortar that is significantly harder than the surrounding brick can cause the brick faces to spall and crack, because the mortar becomes a rigid barrier that concentrates stress rather than absorbing movement. A mason experienced in chimney work will match mortar type to brick type as carefully as color.
Brick Replacement and Spalling
Spalling refers to the flaking, chipping, or crumbling of brick faces, and it is a sign that moisture has already penetrated the masonry and caused internal damage through freeze-thaw action. Chimney brickwork repair for spalling involves replacing the affected bricks with material that matches as closely as possible in size, density, and texture.
Matching replacement brick to original masonry can be genuinely difficult on older chimneys, where brick dimensions, firing methods, and color profiles no longer correspond to anything currently manufactured. Experienced masons often source reclaimed brick from salvage yards or use new brick selectively blended with original material to minimize the visual discontinuity. On chimneys where widespread spalling has affected many courses, partial or full rebuilding of the above-roofline section is sometimes more practical than piecemeal replacement.
One underappreciated cause of spalling is improper waterproofing. When a non-breathable sealant is applied to brick that already contains internal moisture, the sealant traps that moisture inside the masonry and dramatically accelerates freeze-thaw damage. Waterproofing a chimney requires a vapor-permeable product specifically rated for masonry, not a film-forming exterior paint or general sealant.
Fireplace Brick Restoration Inside the Home
While the above-roofline chimney receives most of the weather exposure, the interior firebox has its own set of repair requirements. Fireplace brick restoration focuses on the firebox, the combustion chamber visible from inside the home, which is lined with refractory brick designed to withstand temperatures that ordinary building brick cannot handle.
Cracked or missing refractory bricks, damaged mortar joints within the firebox, and deterioration of the smoke chamber directly above the damper are all issues that affect both the safety and efficiency of the fireplace. A compromised smoke chamber, in particular, can allow carbon monoxide to migrate into living spaces through the path of least resistance rather than being carried up the flue.
Smoke chamber restoration often involves a process called parging, in which a refractory mortar is applied over the irregular brick surface of the smoke chamber to create a smooth, sealed interior. This improves draft, reduces the surface area available for creosote accumulation, and seals any gaps that could allow gas migration. It requires high-temperature rated materials and is not a job for standard masonry mortar.
When to Have the Flue Relined
The flue liner is the interior conduit through which combustion gases travel from the firebox to the outside air. Damaged or deteriorated liners are a significant safety concern because these can allow heat and combustion gases to transfer into the combustible structural framing within the home’s walls and ceiling.
Original clay tile liners crack under thermal stress and are difficult to repair in place. Relining is typically accomplished with a flexible stainless steel liner inserted from the top of the chimney, or with a poured-in-place liner material that conforms to the existing flue shape and fills gaps and cracks. Both methods restore the flue to safe operating condition and are often required when the connected heating appliance is upgraded or changed.
Getting the Scope Right Before Any Work Begins
Before any chimney masonry repair work is carried out, a proper inspection establishes what is actually wrong and what the full scope of repair should be. A Level 2 inspection, which includes a video scan of the flue interior and examination of all accessible chimney components, is the standard recommended after a chimney event, a real estate transaction, or when a chimney has not been inspected in several years.
Skipping the inspection and proceeding directly to visible repairs is a common mistake that often results in surface work being completed over undetected structural or liner problems. A thorough assessment before work begins ensures that repairs address the actual failure points rather than the symptoms, and it provides documentation that can support insurance claims or seller disclosure requirements in a home sale.
The cost of maintaining a chimney with regular inspection and timely tuckpointing is modest compared to the cost of chimney brickwork repair after structural deterioration, chimney crown repair after a water intrusion event, or fireplace brick restoration after years of deferred maintenance have allowed damage to compound. The structural integrity and safety of a chimney depend on addressing problems at the mortar-joint stage, not after the bricks begin to move.
